Subject 1-5
Subject 1-5
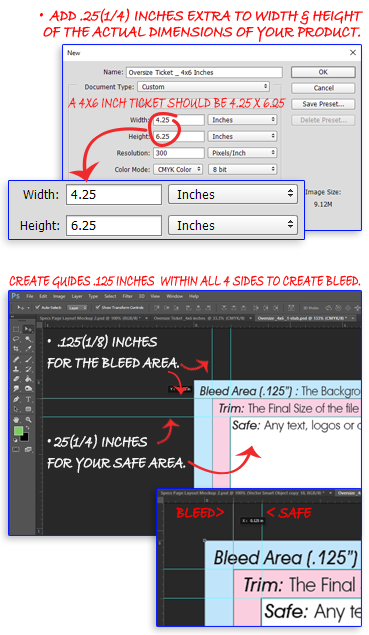
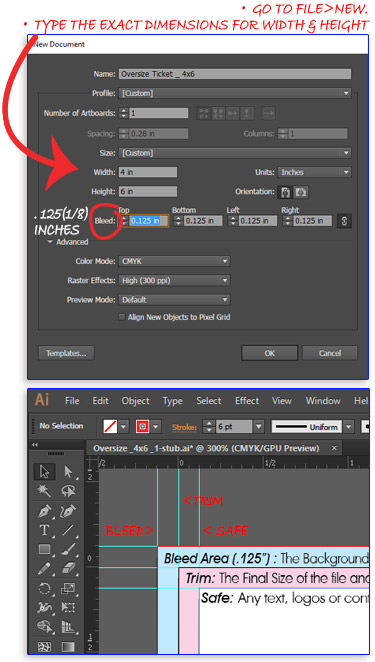
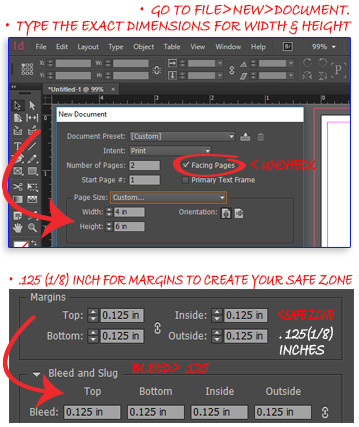
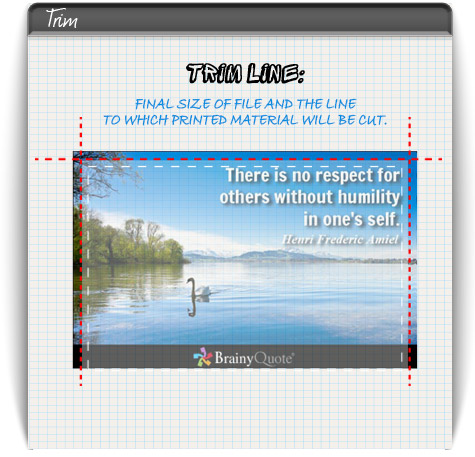
A job cannot be trimmed perfectly to it's final size everytime. Because of this slight imperfection, we create an extra margin past the trimming line for the graphics and background to bleed off the artboard where the print is meant to be trimmed off. This way ensures no unwanted white borders or imperfections appearing around your product.
Standard Bleed: .125 inches

The Trim Line indicates the final size of the product. Borders are not recommended due to cutting shifts while running machinery. If your products is not trimmed exactly on the trimming line, borders may appear uneven. Just half of a millimeter of cutting shift may cause the borders to look uneven.
Standard Bleed: .125 inches
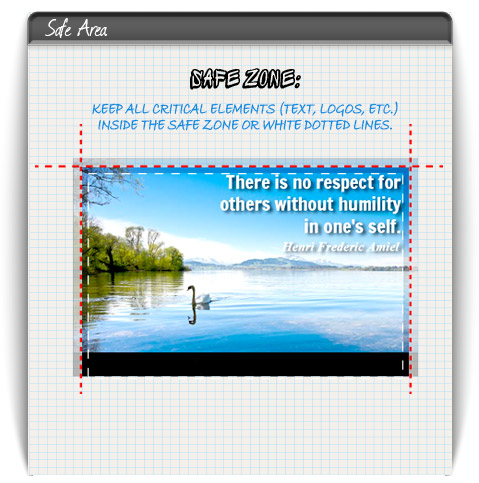
Unless you plan on breaking your grid puposefully, you must place critical elements such as text, imagery, or logos inside the safe zone area. If not, do not be surprised if parts of these elements are cut away when your product is trimmed to it's final size. .125(1/8) inch within trim line would suffice, though some prefer .25 inches.
Safe Area: .125 (1/8) inches
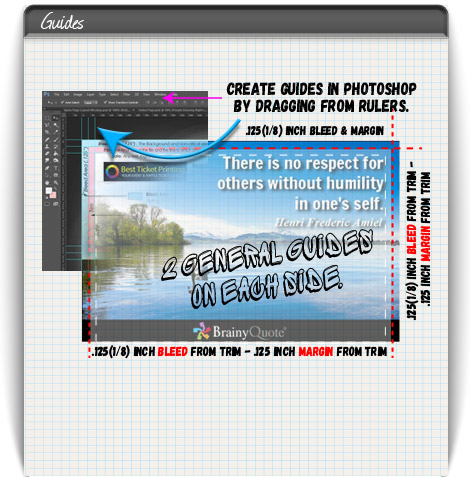
Guidelines such as the safe zone, trim line, and the bleeds help designate where your product will be trimmed, as well as help you keep important elements such as text and graphics away from the trimming margin. Please provide us with a bleed all around your artwork, and be aware of the safe area.
You supply the bleed, and we'll handle the Crop Marking.
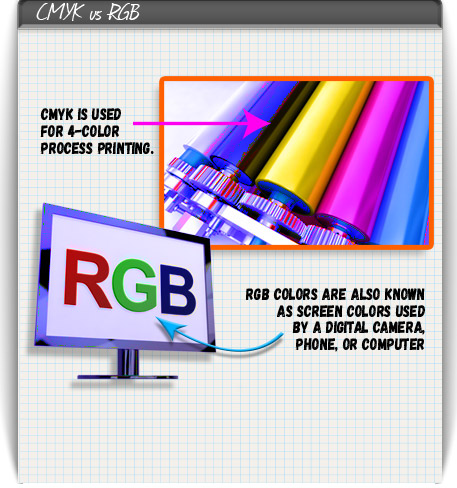
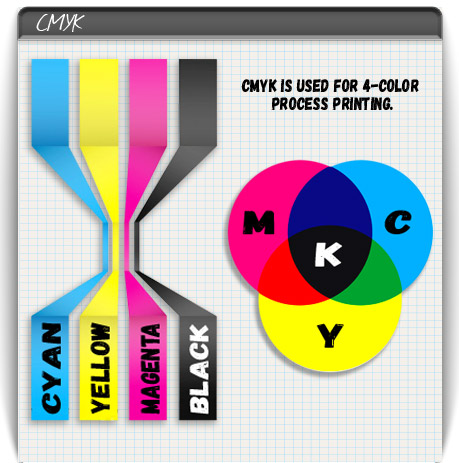
CMYK is used for 4 Color or Process Printing. It is the color used for the majority of printed materials. But Images from your phone, digital camera, and computer screen is shown in RGB. RGB is also known as Screen Colors you see from a monitor. You should convert images and designs to CMYK before you send files to the printing stage.
Print: CMYK / Screen: RGB
CMYK stands for Cyan, Magenta, Yellow, and Black(key). These four inks are printed together to create full color images. CMYK is subtractive in light - scientifically, you se color by light reflecting from a white peice of paper and the inks gradually subtract or absorb the light creating all different colors until finally Black.
CMYK: Subtractive color
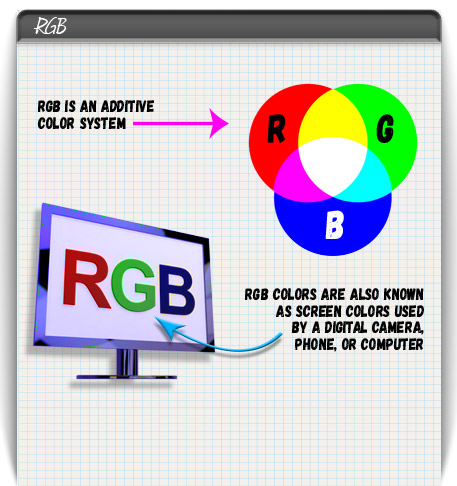
RGB stands for Red, Green, and Blue. It’s an additive, projected light system. From a screen Monitor of any sort, all colors begin with “darkness”, to which diferent color “lights” are added to produce visible colors. RGB “maxes” at white, which is the equivalent of having all lights on at full brightness (red, green, blue).
RGB: Additive Color
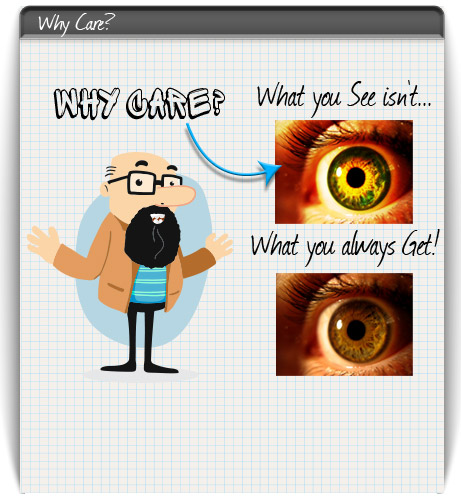
Many commercial printers accept RGB images, however, using images that are in RGB color mode may ruin the appearance of the final printed material. It’s imperative you provide us with print-ready, digital files in CMYK color mode, and provide all Black and White artwork in grayscale color mode. Any other color will not produce optimal printing results.
CMYK for Print.
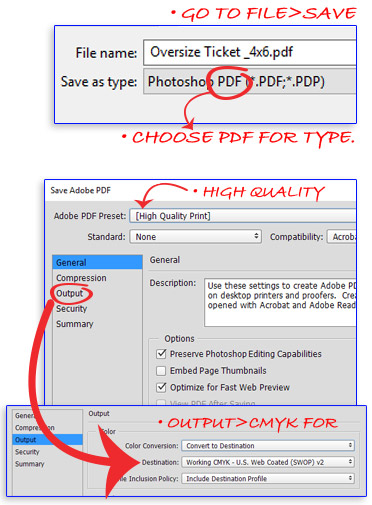

CMYK is used for 4 Color or Process Printing. It is the color used for the majority of printed materials. But Images from your phone, digital camera, and computer screen is shown in RGB. RGB is also known as Screen Colors you see from a monitor. You should convert RGB images and designs to CMYK before you submit them to a printer.
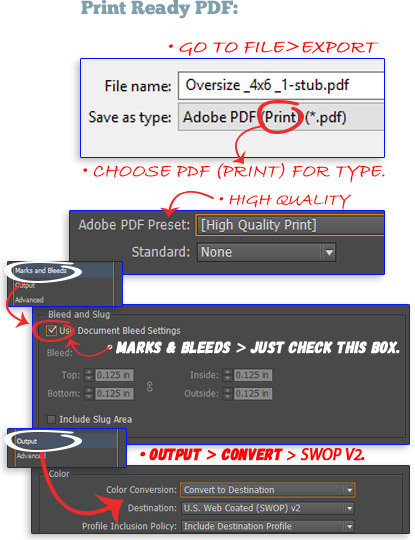
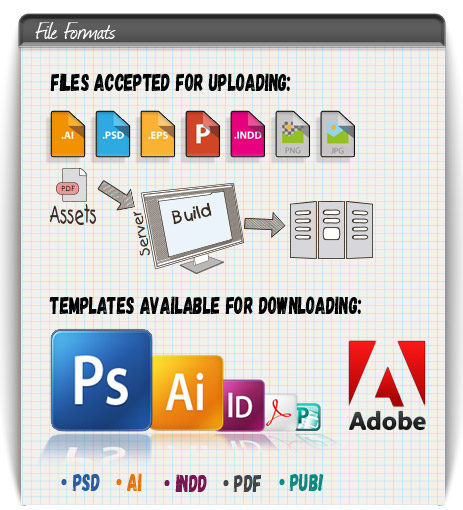
Most Print Compatible: PDF
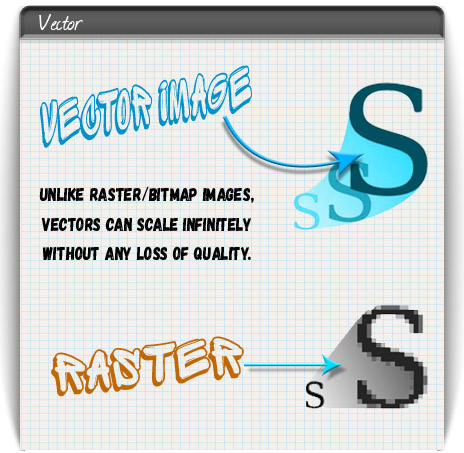
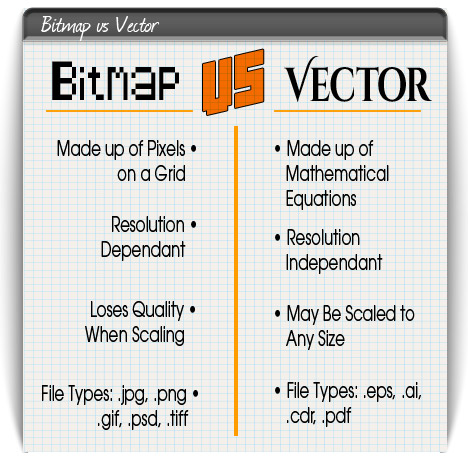
Bitmap/Raster characteristics: Made up of pixels on a grid, Resolution dependant, Loses quality when resized. (gif, jpg, png, psd, tiff)
Vector Characteristics: Made up of mathematical equations, Resolution independant, scales infinitely. (eps, ai, cdr, pdf)
Print Friendly: PDF & EPS
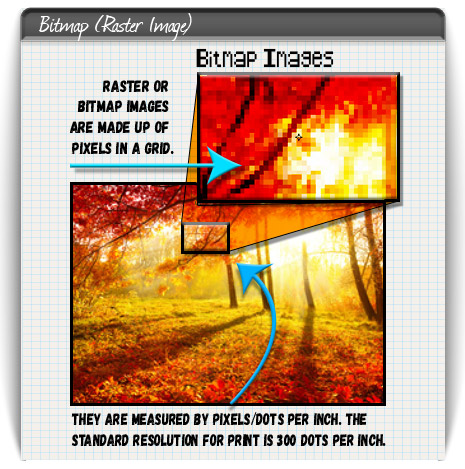
Bitmap or Raster images are measured by dots per inch (dpi). The more dots/pixels, the better resolution and quality image. Tiffs, Jpegs, and even PSDs at 300 dpi are what you should be saving your bitmaps files as...Tiffs and PSDs are native and preserve the best quality.
Standard Resolution: 300dpi
Vector Images are measured by a mathematical equations using lines and curves that create clean, crisp artwork. You can scale these images without any loss in quality. Software programs such as Adobe Illustrator are vector programs. You should save vector art as an EPS, PDF or Ai File.
Vector Program: Illustrator